
 We all know writing good content is hard.
But you also need to make it as visually appealing as possible if you want the most people to read that content.
Enter colored text boxes:
Sprucing up your wordpress content with content color boxes adds a nice touch to your content…
…and since most bloggers and website owners aren’t doing it, you can really set yourself and your content apart from the crowd.
Here’s how to do it:
Step 1: Creating a Colored Text Box with HTML
Head over to the piece of content that you want to add your colored text box to.
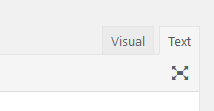
You need to go to the “Text” tab of the wordpress text editor since you’ll be entering some code.
 Now find the sentence/text or whatever else you want your colored text box to contain.
From here, add this to the beginning of your text/sentence:
<div id="colorbox">Now add this to the end of that text/sentence:
</div>For example, I’m going to create a text box around the sentence:
“This is colored text box.”
And here’s what it will look like:
<div id="colorbox">This is a colored text box.</div>Note: you can name the part between the quotes to whatever you want; so it could be “redbox” or “bluebox” or “colorthing”.
Again, just make sure you’re doing this in the text editor and not the visual editor of the wordpress post editor.
So at this point if you were to preview your post you’d notice that nothing happens to the sentence that you’ve just wrapped in your colorbox code.
This is because we need to tell our website what that color box is supposed to look like.
Here’s how:
Step 2: Styling our Colored Text Box with CSS
You’ll now need to head over to your preferred means of adding CSS to your website.
That will likely either be through your child themes style.css sheet located in Appearance>Editor…
…or through the use of a custom css plugin like Simple Custom CSS…
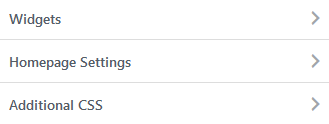
…or by going to Appearance>Customize>Additional CSS in your wordpress dashboard.
If you don’t have a preferred way, we’re going to go to Customize>Additional CSS (available for all wordpress versions 4.4 or later).
However, before you do that it’s better if we can open the Customize option panel directly on the post we’re adding the colorbox to.
So press the “preview” button on the post you’re adding the colored box to in order to preview your post, which should open it up in a new window.
From here, press the customize option located at the top in the admin bar:
![]()
And then click on Additional CSS within the customize options:
Otherwise, save the post as private and navigate to it after going to Appearance>Customize.
The point is that you just want to be in Customize>Additional CSS page while having the post containing the color box up on your screen.
The reason is because it will allow you to preview CSS changes in real-time.
Next, we need to add this code into our Additional CSS:
#colorbox {

}
Remember to change the “#colorbox” part to whatever you named your color box before; so if you named it “redbox” you’d put “#redbox” instead.
Now, between these brackets you need to add the specifics of how you want to style your box.
Here’s what you probably want to do:
#colorbox {

background-color: #dff8ec;

}
Adding “background-color: #dff8ec;” will make the box have color:
Note: You can find the hex numbers for different colors by going to a place like Color Hex or Adobe.
Okay, so this doesn’t look so great. And we’re going to add some padding to fix that.
#colorbox {

background-color: #dff8ec;

padding: 20px 30px 20px 30px;

}
Here’s what it looks like now:
If you want to center the text inside the box, you can do it as you normally would with any text: by highlighting the text in the visual editor tab of the post editor and pressing the align center button.
If your color box is appearing to close the the text that follows it in your articles you can add “margin-bottom: 25px;” to fix that:
#colorbox {

background-color: #dff8ec;

padding: 20px 30px 20px 30px;

margin-bottom: 25px;

}
Of course, change the “25px” to whatever you want.
One other styling option worth mentioning is adding a border:
This is achieved by adding “border: 3px solid #888;”.
#colorbox {

background-color: #dff8ec;

padding: 20px 30px 20px 30px;

margin-bottom: 25px;

border: 3px solid #888;

}
Where 3px is the thickness of the border; solid means it’s a solid line; and #888 is the color.
If you saw my post on how you can make passive income, you’ll see that I made a really thick border so my color box looked like it was inside another color box.
It looked like this:
If we apply that idea to our green box, by setting the “border: 3px solid #888;” to “15px” instead of “3px” we get a similar effect:
The last thing I want to mention is making the box look rounder.
We can achieve this by adding “border-radius: 5px;”.
#colorbox {

background-color: #dff8ec;

padding: 20px 30px 20px 30px;

margin-bottom: 25px;

border: 3px solid #888;

}
So now it looks like:
That’s It
Not too hard, right?
And now you can decorate all of your posts in as many colored boxes as you want.
Add these into your content to keep it interesting and your visitors will love it.