
 Having your post author name appear below the post title on your wordpress website can be a good idea.
For example, it can be an immediate trust signal to your readers…
…especially if the author is well-known or can include a degree like PhD
However, sometimes you’ll have a wordpress theme that doesn’t automatically include the author or even the date under the post title.
And there are no options to add it.
In this case, I’ll show you exactly what you can do to get the author or date or both under the post title:
Add Only Author Name Below Post Title
by <?php the_author(); ?>Add Only Date Below Post Title
<?php the_time(‘F jS, Y’); ?>Add Both Author and Date Below Post Title
by <?php the_author(); ?> on <?php the_time(‘F jS, Y’); ?>Depending on how your theme is setup, you’ll typically either need to paste the code in your “single.php” folder or in some cases your theme might have something like “post-meta.php”.
Easily Customize the Look and Location
Depending on your theme, the actual location of the author or date might be located too close or far, or aligned in the wrong position.
For example, when I recently had to add the author info below the post title to one of my websites, it ended up being centered under the title which I didn’t want.
Here’s what you’ll need to do:
First, wrap the code you want in a P Class.
You’ll notice below I called this p class “author-date-info”; keep in mind you can name it whatever you want.
<p class="author-date-info">by <?php the_author(); ?> on <?php the_time(‘F jS, Y’); ?></p>Now, if you’re running WordPress 4.7 or later you’ll find a customize section called Additional CSS, so head over to Appearance>Customize>Additional CSS.
The nice thing about this is you can preview in real time how your CSS code will affect your website.
If you don’t see Additional CSS in your Customize options, then you can always use a CSS plugin like Simple Custom CSS.
Note: Adding code to Appearance>Customize>Additional CSS applies to the theme you’re using. If you later on change themes entirely but want to keep that code, you’ll simply need to copy and paste it back into Appearance>Customize>Additional CSS for the new theme.
Once you’re here, you’ll need to add the code which corresponds to whatever you named your p class just a moment ago.
In my case it looks like this:
p.author-date-info {

}
Now you can add any customizations you want make in between the brackets.
For example, on my site the author and date info was showing up centered below the title.
And it was also spaced too far down from the post title, and the same color as my regular text.
So my CSS code looked like:
p.author-date-info {

text-align: left;

font-size: 0.95rem;

margin-top: -5px;

color: #555;

}
You can play around with it (i.e. the colors, font size, font family, margins, etc) until you get it looking exactly the way you want.
Something to Consider
You should keep in mind that when your theme updates it will overwrite all theme files.
So depending on how you’ve added the php code (e.g. “by <?php the_author(); ?> on <?php the_time(‘F jS, Y’); ?>“) above, it might get overwritten and require you to input it again later on.
An easy way to avoid this is to create a child theme, which is generally recommended for wordpress websites.
This also reminds me of one of the many reasons why I really like and recommend Generate Press as a beginner-friendly wordpress theme…
…because you don’t need to worry or bother with any of this.
One of the features included in Generate Press allows you to easily enter text or code at virtually every important position on your website.
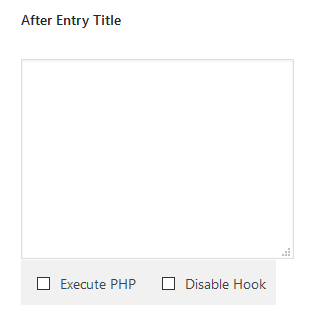
All you would have to do is enter the php code into the text box that’s designated to that part of your site… and voila, it’s done.
If you’re interested, consider checking out Generate Press — it’s what I built this blog on.